So, I started pricing covers and decided they were either (1) too expensive for my cheap budget, and/or (2) too bland. I love to browse etsy.com for inspiration and decided I would make one myself.
Supplies:
- 1 piece of fabric for outside cover - 9" x 12"
- 1 piece of fabric for inside cover - 9" x 12"
- 2 pieces of fusible batting - 9" x 12" each (my batting was pretty thick; I probably could've just used one piece)
- 1 piece of fabric for pocket - 7" x 9"
- 4 squares of fabric for nook anchors - 3" x 3"
- Button and 6" of ribbon
- Extra fabric and rhinestone for embellishment (optional)
- Fabric glue
Note: My original plan included plastic canvas for support; however, it just didn't work since my batting was thick enough, and I discovered that I was creating more sewing work for myself. :) So, pretend like you don't see the canvas in the photo.

1. Fuse the batting to the fabric for the inside and outside cover and set aside.
2. Fold the fabric for your pocket in half, wrong sides together, and stitch about a half inch from the fold. Set aside.

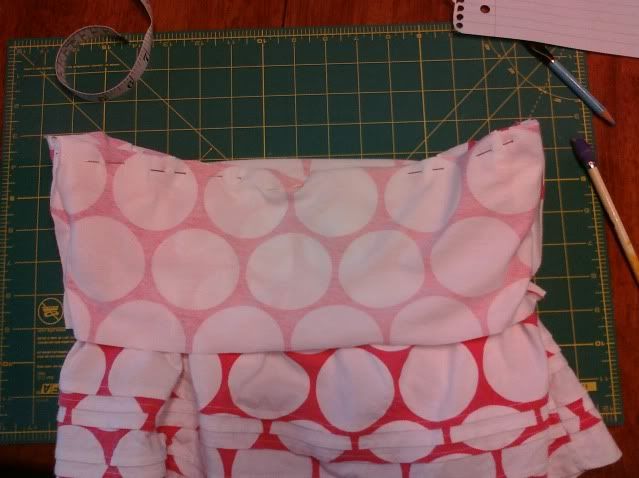
3. Fold two of the squares into triangles (wrong side facing), and line them up with the right side of the inner cover. Pin the edges into place. (Note that the fold should face inward.)

4. This is where a cutting mat comes in handy. Place the inside cover on the mat so that it lines up with the ruler. Place the other two triangles (fold facing inward) so that they are lined up with the 6" mark. Then turn the vertical edge under about 1/4" and pin into place. (Oh and if you're wondering about that extra little piece of the fold that shows, just clip it off and seal with fabric glue.)

5. Sew the outside edges of the triangles onto the inside, using as small of a seam as humanly possible. ;) Then, insert your nook and breathe a huge sigh of relief when it actually fits. :)

6. Remove your nook and place the pocket along the left edge, fold facing inward. Pin into place.

7. I now realized that I forgot to take pictures of the next few steps. Take your outside cover and measure in about 1 3/4" from the center of the edge. Place the center of your button on this mark and stitch onto the fabric. Now, take the outside cover and place it on top of the inside cover (wrong sides facing) and pin together. Make sure your button is facing the side with the pocket. Stitch around the cover with a 1/4" seam, leaving a gap on the side with the triangles. Clip across your corners so that they're not so bulky.
8. Turn the cover right side out. It takes a little bit of work, especially if you didn't leave a big enough gap like me. ;) Reinsert your nook and breathe another sigh of relief when it still fits.

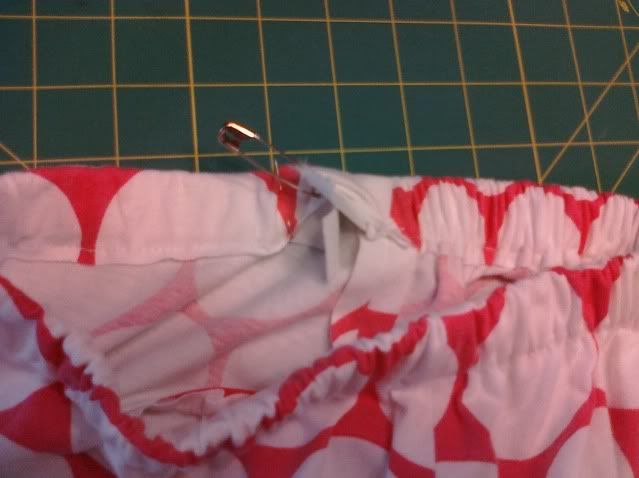
9. Fold your cover so that you can see where you need to insert the ribbon. I tucked mine in about 3/4". Fold the raw edges inward and pin together. Stitch along the edge.

10. Your sewn edge should look like this (I like to reinforce around the ribbon). You may want to stitch around the entire cover just to finish it off. Mine was pretty bulky, so I opted not to.

11. You're done! You may want to press it open with an iron (without the nook, of course!)

12. Oops, I forgot the embellishment! I cut two circles from my fabric and glued them to the cover. I then glued a rhinestone to the center. Breathe your final sigh of relief as you fasten it closed. :)